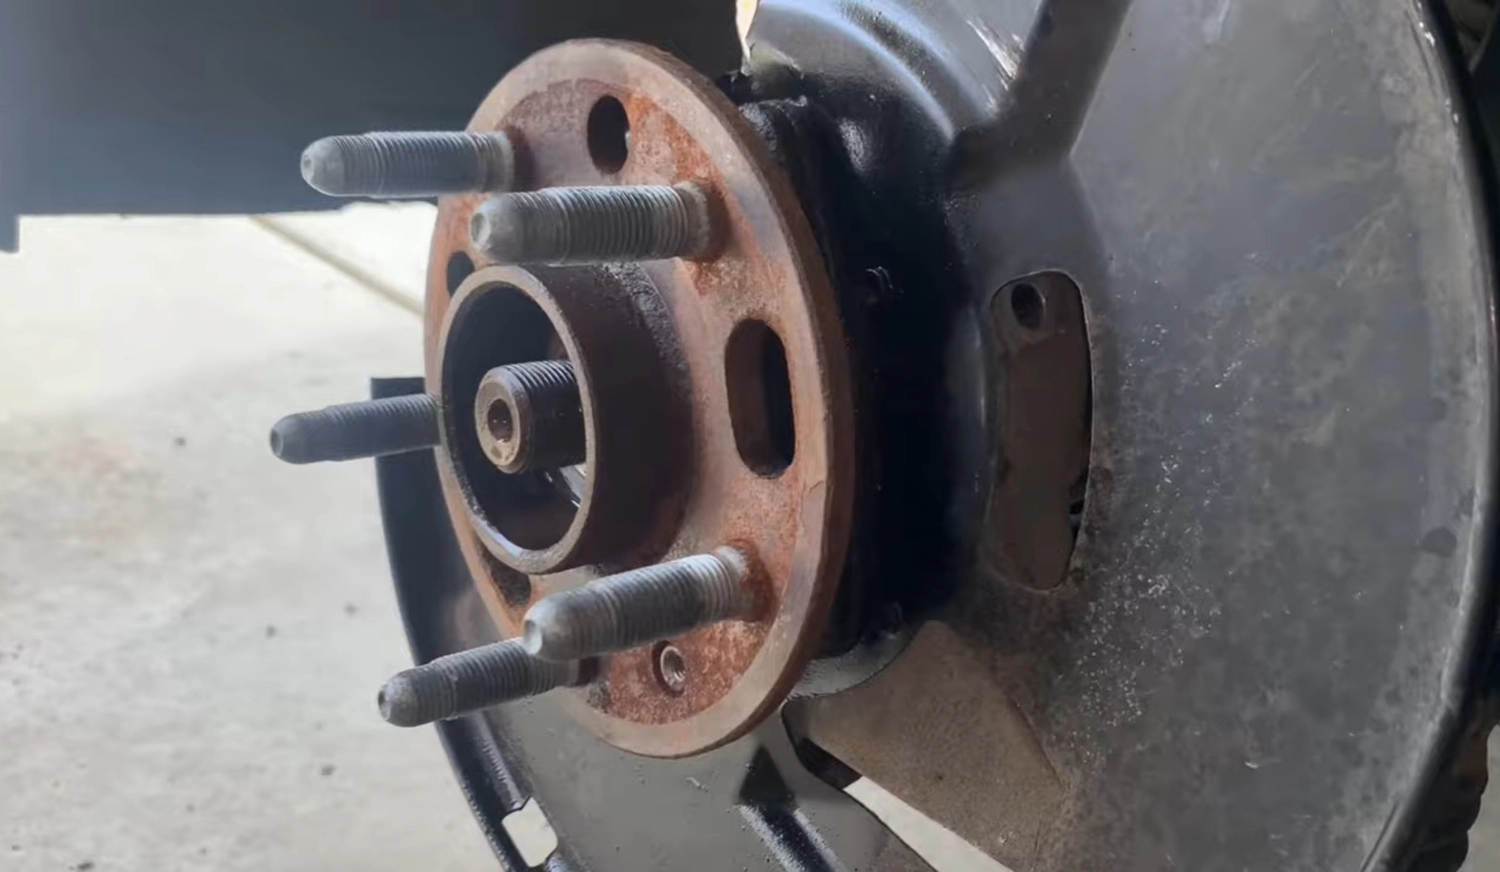
For anyone who has ever battled a seized, rusty wheel bearing, the struggle is real. If you’ve ever watched a video where someone effortlessly pulls a wheel bearing out by hand, you probably laughed—or cried—because that’s rarely how it goes in the real world. In climates where snow, salt, and moisture create layers of corrosion, wheel bearings become practically fused to the knuckle. You can spray all the penetrating oil you want, but often, brute force seems like the only option.
But there’s a better way. No need for a sledgehammer marathon or hours of frustration. This method, using just a couple of bolts and nuts, makes removing a stubborn wheel bearing surprisingly easy. Whether you’re working on a 2014 Chevy Impala or any other make and model with a similar setup, this technique could save you time, effort, and maybe even a little sanity.
The Setup: What You’ll Need
To create a simple yet effective “pusher bolt” arrangement, gather the following materials:
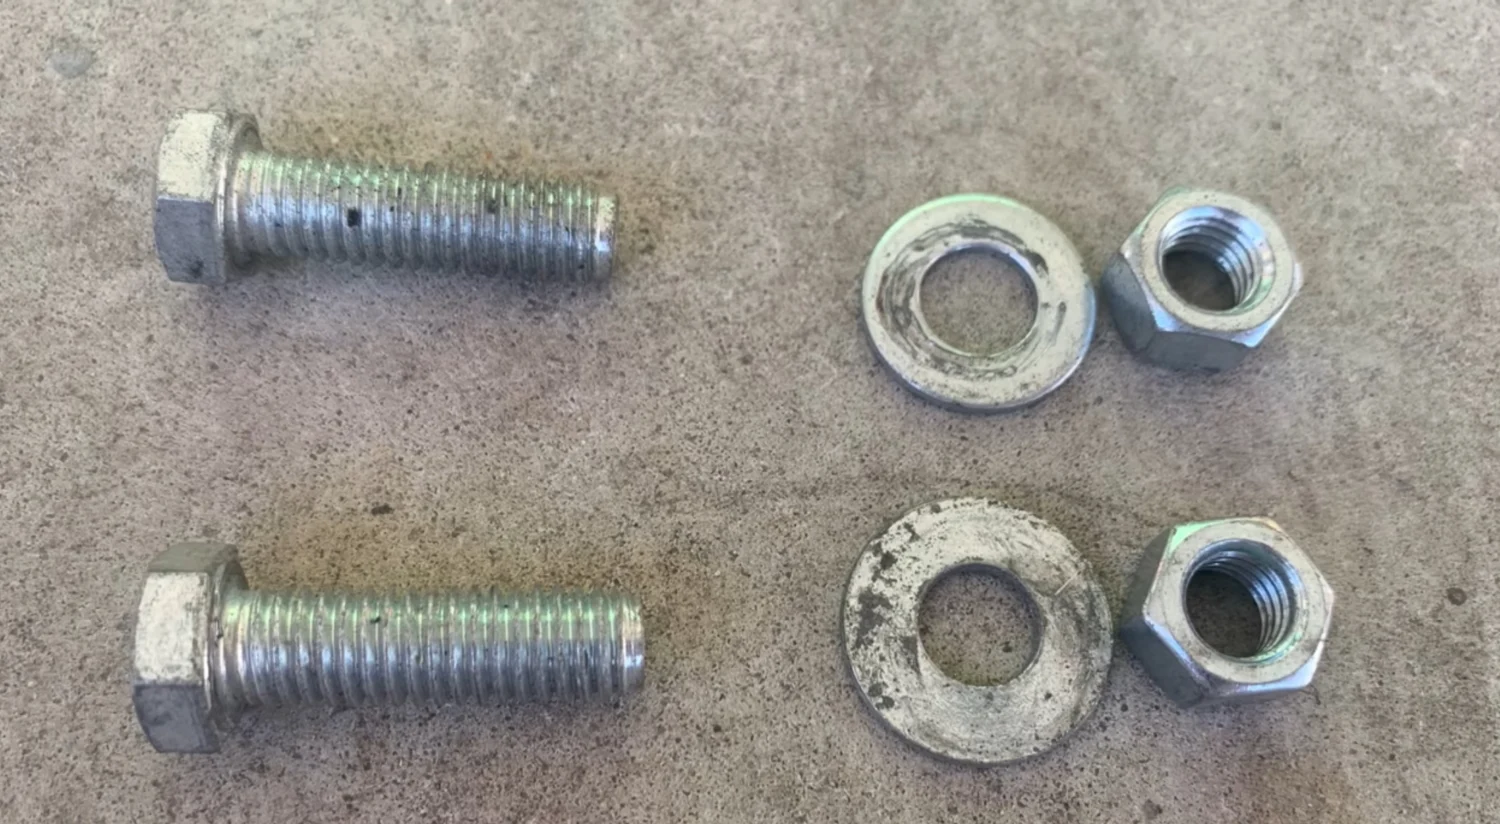
- Two fully threaded bolts (half-inch or larger; 5/8-inch is ideal if it fits)
- Two flange nuts or two flat washers with hex nuts
- A socket wrench for the bolts
- An open-end wrench for holding the nuts
- Penetrating oil (optional but worth a try)
- Some sort of spacer (to prevent damage to the dust shield)
If you’re lucky, you may already have the necessary hardware in your collection of random nuts and bolts. If not, a quick trip to the hardware store will cost you less than five bucks.
Finding the Right Pressure Points
Before you begin, take a look at the knuckle around the wheel bearing. The key is to find two solid points where metal protrudes beyond the bearing assembly. These surfaces will serve as the bracing points for your bolts. On the 2014 Chevy Impala, for example, there are two perfect flat surfaces behind the dust shield. Other vehicles will have similar points, but they may require slight adjustments.
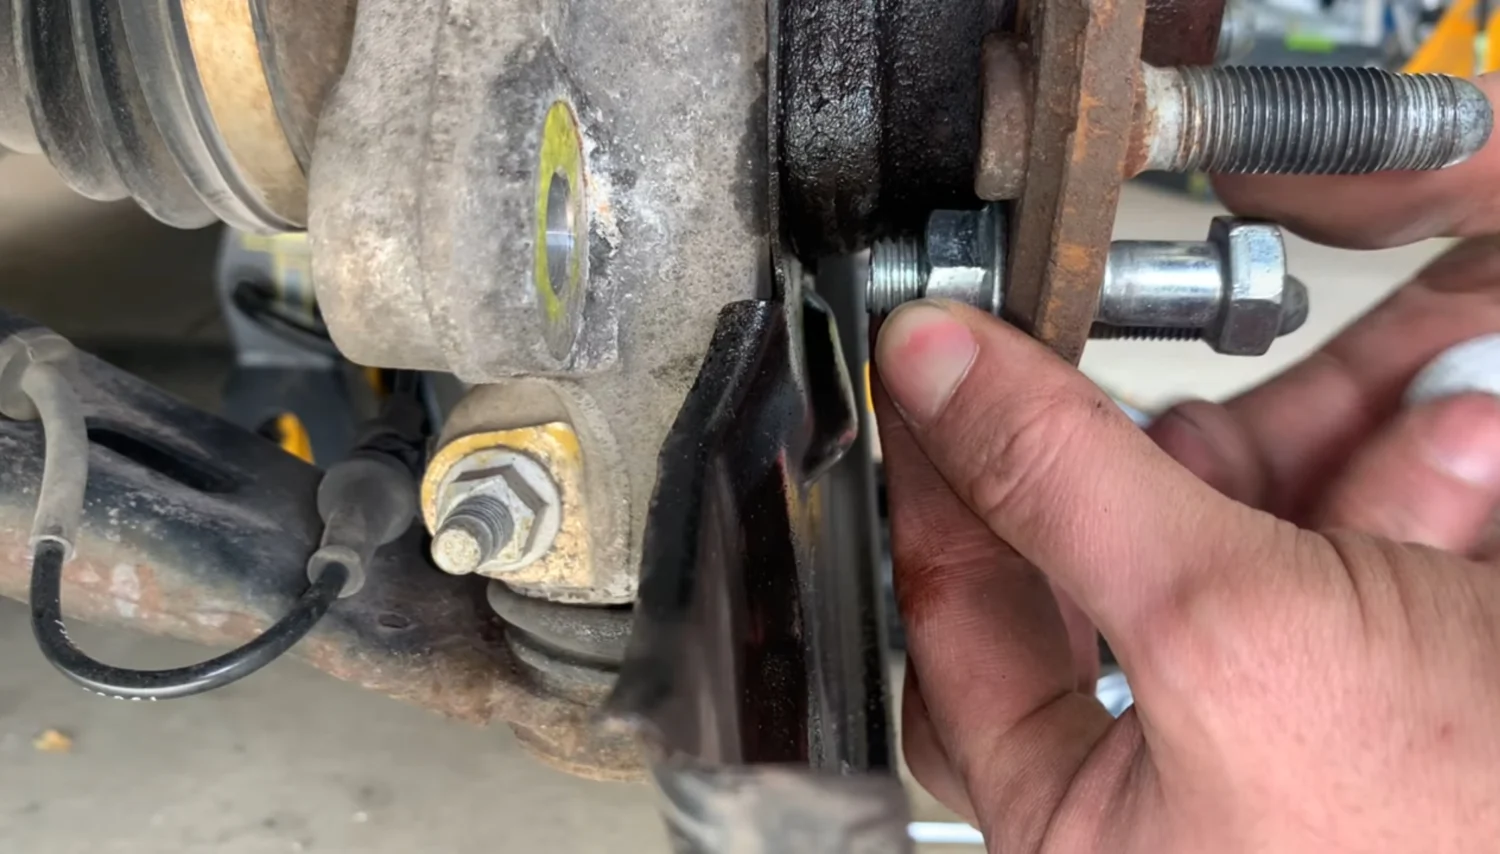
If there are no existing holes in the wheel bearing flange to insert the bolts, you can knock out a couple of lug studs to create them. They’re just press-fit, so a punch and hammer will do the trick.
Setting Up the Pusher Bolts
Once you’ve identified your pressure points and aligned your bearing holes, it’s time to set up the bolts.
- Thread the bolt through the wheel bearing flange, positioning it so that it pushes against the solid surface on the knuckle.
- Place a protective spacer between the bolt and the dust shield to avoid chewing through the metal. Thick round spacers work well, but anything solid will do.
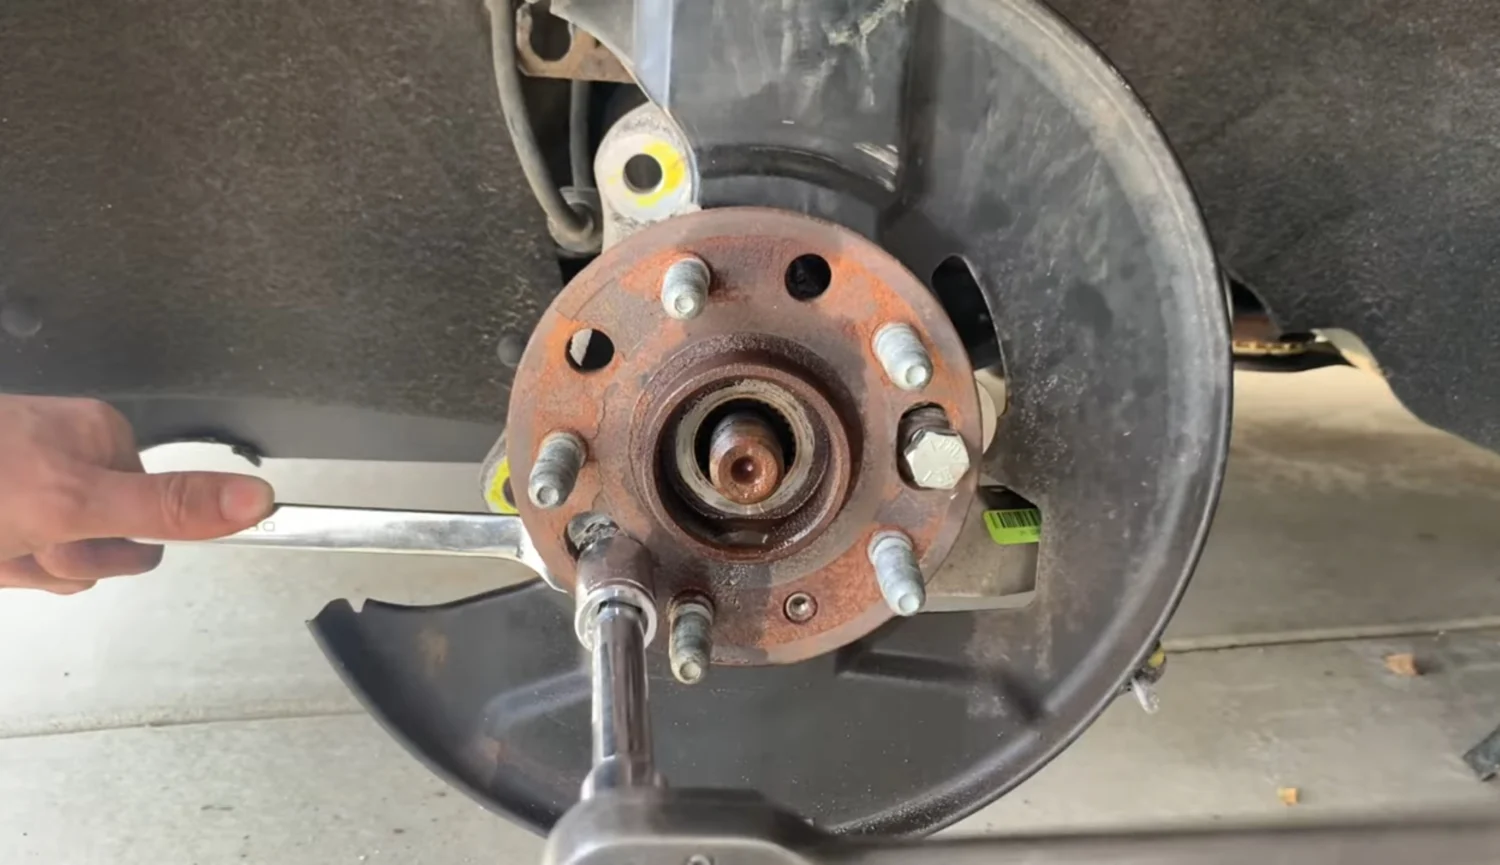
- Hold the nut steady with the open-end wrench while rotating the bolt with a socket wrench.
- Alternate between the two bolts, turning each one a little at a time to evenly apply pressure.
Slowly but surely, this method will walk the bearing right out of the knuckle.
A Word on Bolt Strength
There’s a lot of force involved here. In the past, smaller 3/8-inch bolts have simply snapped under pressure. The half-inch bolts used in this demonstration worked well, though one did shear off near the end of the process. Fortunately, by that point, the bearing had already separated enough that a simple tap with a hammer finished the job. If you can fit 5/8-inch bolts, even better—they’ll be more resistant to breaking under load.
Final Removal and Clean-Up
Once the bearing has shifted out of place, it’s essentially home free. Any remaining resistance can be handled with a hammer and a few well-placed taps. Expect the dust shield to take a bit of a beating, but in most cases, the damage is purely cosmetic. If it does end up bent, a vise can easily straighten it back out.
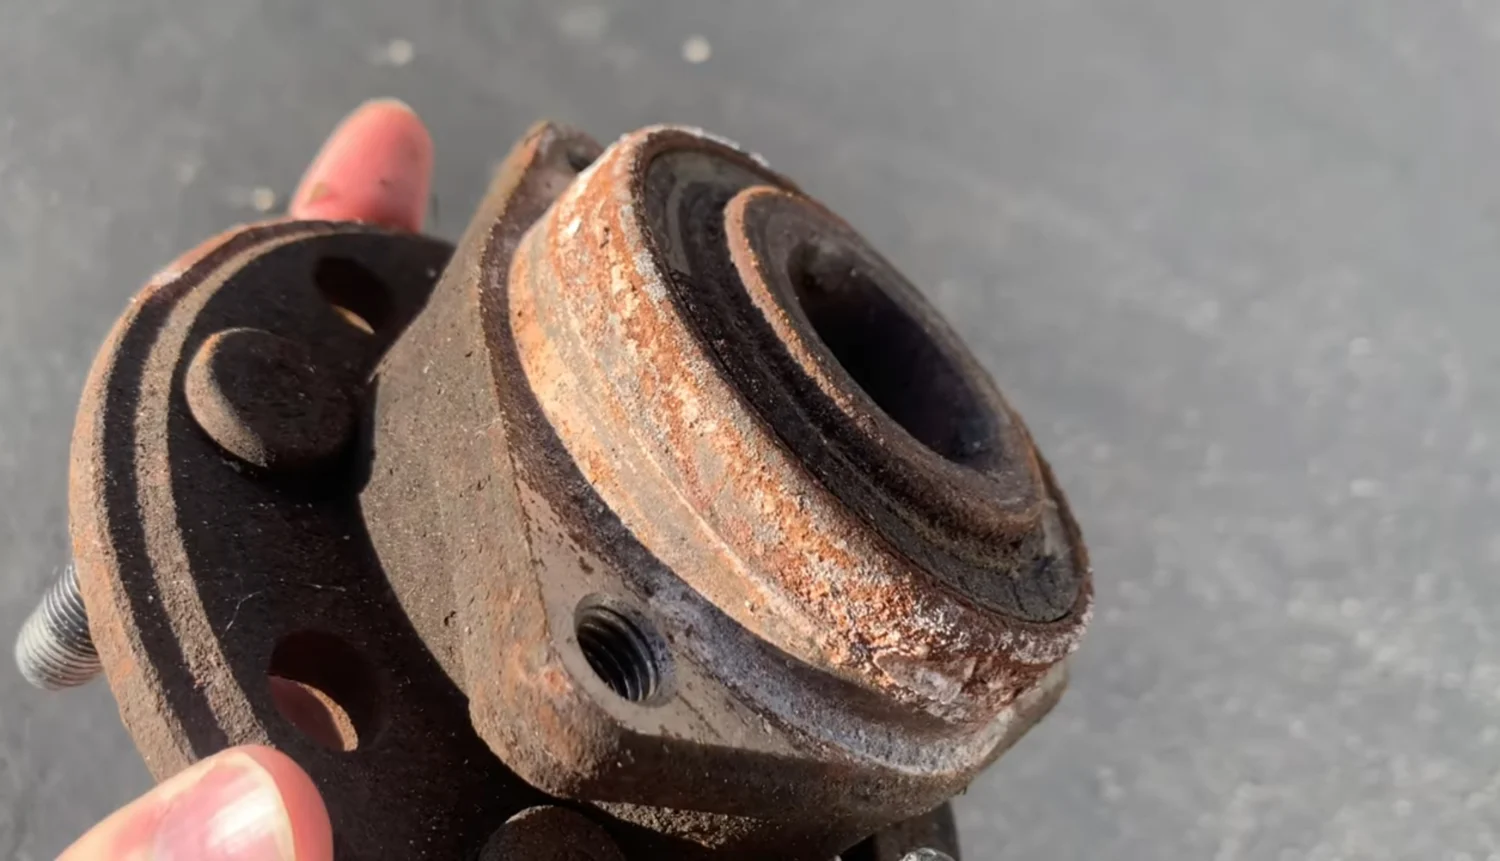
Upon removal, you’ll likely see layers of rust and corrosion clinging to the old bearing. If this method worked for you, you just saved yourself a lot of headaches—and possibly a few bruises—from taking the traditional hammer-swinging approach.
Lessons Learned and Variations
This method isn’t just limited to a single approach. While this demonstration focused on rotating the bolts, you can also try keeping the bolts stationary and tightening the nuts instead. Both techniques apply the same principle of slow, controlled pressure rather than brute force.
One thing is certain: if you’ve ever struggled with a frozen wheel bearing, this trick is worth trying. A couple of bolts and nuts can turn an exhausting ordeal into a simple, effective job.
For more unique solutions to common (and uncommon) automotive problems, check out How-to and Reviews on YouTube: https://www.youtube.com/@HowtoandReviewsOfficial.
